Running Apigility on Azure

Since a couple of years I've been a fan of Microsoft Azure, the cloud platform by Microsoft. It offers a platform as a service (PaaS) in the form of Azure Websites which makes it a great solution to prototype and to play with new stuff.
Last year Matthew Weier O'Phinney announced Apigility at ZendCon, a manager for API design. It was immediately clear that it would revolutionise the way we would design and manage REST API's.

Getting started
The first thing we need is to download apigilty on your local development machine. There are several ways to do this, but I prefer to just clone the apigilty skeleton from GitHub.
git clone https://github.com/zfcampus/zf-apigility-skeleton.git dragonbe-demo-api
Since composer is included with the skeleton, we just need to self-update composer.phar and let it install all required libraries.
cd dragonbe-demo-api/
php composer.phar self-update
php composer.phar install
We're all set now. Time to get started with our first API endpoint. Let's enable development mode first so we have access to the management interface.
php public/index.php development enable
And if you run PHP 5.4 or higher (if not, now is a good time to upgrade) you can fire up the build-in PHP web server (only from PHP 5.4.8 and up) to quickly getting started with managing REST API endpoints.
php -S 0.0.0.0:9999 -t public/ public/index.php
If you now surf to http://localhost:9999 you should see the Apigility welcome screen.

Your first REST endpoint
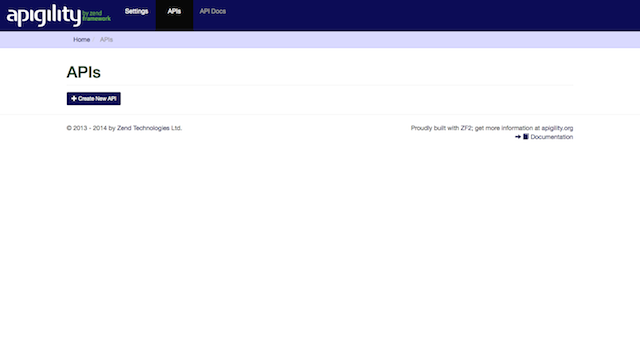
Click on the button "Get Started" to continue.

Continue with create new API.
A popup will ask you to provide a name for this API, I've named it "demo" for the purpose of this blog.
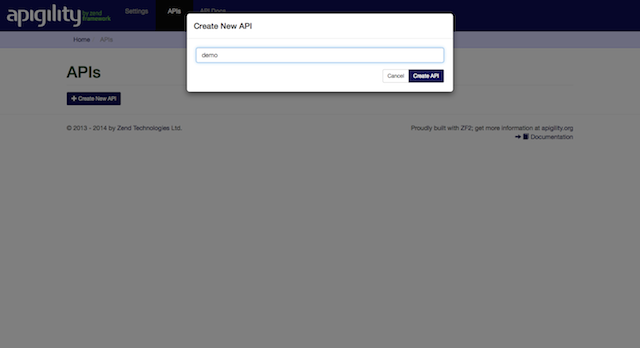
The API demo (v1) will be created and an overview will be presented.

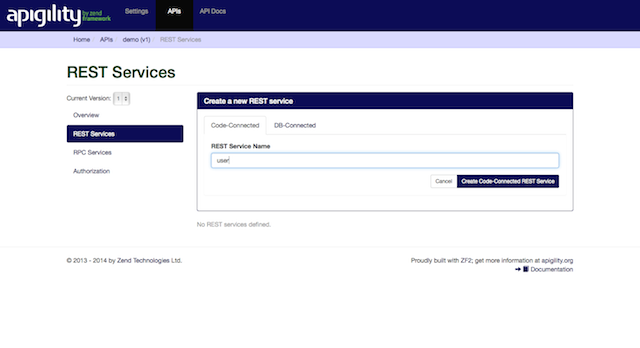
In order to have something useful from this, we need to create a new REST endpoint.

Because we're just demonstrating the usage of Apigility we're selecting the "code connect" option and we name our endpoint "user".
An overview will give us more details how to reach this user endpoint.
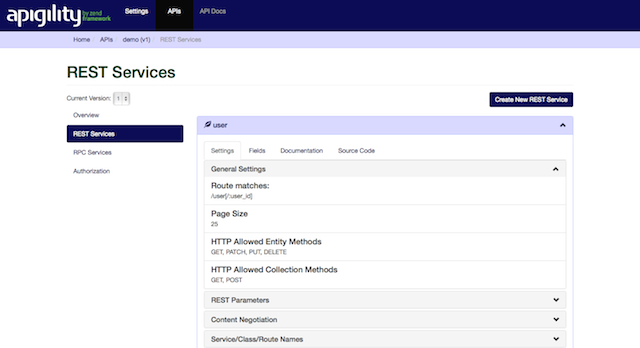
When we click on the tab "source code" we get a list of classes used for this user endpoint. We're interested in the Resource Class
demo\V1\Rest\User\UserResource.php.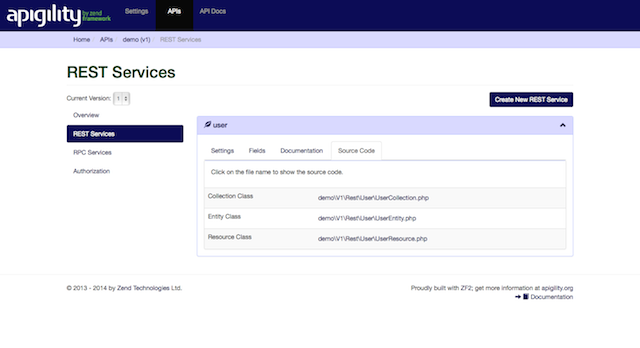
Let's test our endpoint now using curl.
curl -i http://localhost:9999/v1/user
This will give us the following response.
HTTP/1.1 405 Method Not Allowed
Host: localhost:9999
Connection: close
X-Powered-By: PHP/5.4.30
Content-Type: application/problem+json

{"type":"http://www.w3.org/Protocols/rfc2616/rfc2616-sec10.html","title":"Method Not Allowed","status":405,"detail":"The GET method has not been defined for collections"}
This means our configuration is good and we're ready to implement the "business logic".
Let's code a bit
In
UserResource.php we look at two methods:fetch($id)fetchAll($params = array())
The first method "fetch" will give us a single entity while the second method "fetchAll" is responsible for returning a collection of entities.
The first thing we do is creating a ficture (just for the purpose of this demo) where we have a list of users.
protected $user = array (
    array ('id' => 1, 'firstName' => 'Matthew', 'lastName' => 'Weier O\'Phinney'),
    array ('id' => 2, 'firstName' => 'Zeev', 'lastName' => 'Suraski'),
    array ('id' => 3, 'firstName' => 'Enrico', 'lastName' => 'Zimuel'),
);
Let's modify the collection method "fetchAll" first, as this is the easy part.
We change the existing code
public function fetchAll($params = array())
{
    return new ApiProblem(405, 'The GET method has not been defined for collections');
}
Into the following
public function fetchAll($params = array())
{
    return $this->user;
}
And when we repeat our request with curl, we get the following result.
curl -i http://localhost:9999/v1/user

HTTP/1.1 200 OK
Host: localhost:9999
Connection: close
X-Powered-By: PHP/5.4.30
Content-Type: application/hal+json

{"_links":{"self":{"href":"http:\/\/localhost:9999\/v1\/user"}},"_embedded":{"user":[{"id":1,"firstName":"Matthew","lastName":"Weier O\u0027Phinney","_links":{"self":{"href":"http:\/\/localhost:9999\/v1\/user\/1"}}},{"id":2,"firstName":"Zeev","lastName":"Suraski","_links":{"self":{"href":"http:\/\/localhost:9999\/v1\/user\/2"}}},{"id":3,"firstName":"Enrico","lastName":"Zimuel","_links":{"self":{"href":"http:\/\/localhost:9999\/v1\/user\/3"}}}]},"total_items":3}
So far so good! Now it's time to add entity functionality as well.
public function fetch($id)
{
    foreach ($this->user as $user) {
        if ($user['id'] === (int) $id) {
            return $user;
        }
    }
    return new ApiProblem(404, 'Specified user was not found');
}
So now we can call it with curl to see how it works.
curl -i http://localhost:9999/v1/user/1
This results in a nice entity result
HTTP/1.1 200 OK
Host: localhost:9999
Connection: close
X-Powered-By: PHP/5.4.30
Content-Type: application/hal+json

{"id":1,"firstName":"Matthew","lastName":"Weier O\u0027Phinney","_links":{"self":{"href":"http:\/\/localhost:9999\/v1\/user\/1"}}}
So now we have a collection and entity functionality for demo purposes. Time to put things online!
First deploy to Azure
Now that we have created our first API endpoint, we can prepare everything to deploy it to Microsoft Azure. There are a few things we need to do before we can actually deploy it, but it's a one-time preparation.
If you haven't downloaded it yet, get the Microsoft Azure SDK for PHP and for your development OS and install it, it will make life so much easier.
Once downloaded and installed, you now have a CLI application to manage your azure configuration. More details can be found at the Microsoft Azure PHP Dev Center.
Web root configuration
We need to add a
web.config file to our code base in the root of the project as it will serve as a configuration for IIS to know where our initial application root folder will be and how to map routing to it.
My
web.config for Apigility looks like this:<?xml version="1.0" encoding="UTF-8"?>
<configuration>
<system.webServer>
<directoryBrowse enabled="false" />
<httpErrors existingResponse="PassThrough" />
<rewrite>
<rules>
<clear />
<!-- Rewrite rules to /public by @maartenballiauw *tnx* -->
<rule name="TransferToPublic-StaticContent" patternSyntax="Wildcard" stopProcessing="true">
<match url="*" />
<conditions logicalGrouping="MatchAny">
<add input="{REQUEST_URI}" pattern="*assets*" />
<add input="{REQUEST_URI}" pattern="robots.txt" />
</conditions>
<action type="Rewrite" url="public/{R:0}" />
</rule>
<rule name="TransferToPublic" patternSyntax="Wildcard">
<match url="*" />
<action type="Rewrite" url="public/index.php" />
</rule>
</rules>
</rewrite>
<defaultDocument>
<files>
<clear />
<add value="index.php" />
<add value="index.html" />
</files>
</defaultDocument>
</system.webServer>
</configuration>
Again, a big shout-out to Maarten Balliauw for helping me creating this simplified configuration file for IIS / Microsoft Azure.
Auto-execute Composer install on Azure
Apigility is dependent on Composer, the popular package manager for PHP. It's a great tool for managing external libraries and dependencies, but it requires to be executed before the application gets deployed.
This is where we will use the Microsoft Azure SDK as we're going to need a deployment execution immediately after the code is pulled in from GitHub.
I found the article of Ahmed Sabbour very useful as a guideline to prepare post-fetch deployments. We will use the Microsoft Azure SDK to generate our deployment scripts.
azure site deploymentscript --php -t bash
Which will create 2 files:
.deployment and deploy.sh. It's the latter which we need to modify to run composer automatically after fetching our code from GitHub.
Just add the following lines in section "# Deployment" of the
deploy.sh script (right after # 1. KuduSync configuration).# 2. Composer install
php $DEPLOYMENT_TARGET/composer.phar install -v --prefer-dist --no-dev --optimize-autoloader --no-interaction
Prepare for GitHub
Maybe it's time to save and commit our changes. After all, we already have a git repository active.
Let's first figure out what has changed so far.
git status
This give us the following list
On branch master
Your branch is up-to-date with 'origin/master'.

Changes not staged for commit:
  (use "git add ..." to update what will be committed)
  (use "git checkout -- ..." to discard changes in working directory)

    modified:   composer.phar
    modified:   config/application.config.php

Untracked files:
  (use "git add ..." to include in what will be committed)

    .deployment
    config/application.config.old
    deploy.sh
    module/demo/
    web.config

no changes added to commit (use "git add" and/or "git commit -a")
We need to add 5 new files to GIT and update 2 files.
git add .deployment config/application.config.old deploy.sh module/demo/ web.config
git commit -am 'First commit of our Demo API'
We still have a small challenge in regards to the Apigility project itself. All our code is still tight directly to the project's repository. We rename the remote location of ZF-Apigility-Skeleton from origin to upstream.
git remote rename origin apigility
Time to create a new project on GitHub for our demo. Log into your account on GitHub or register for a new account. Once in your account, register a new repository.
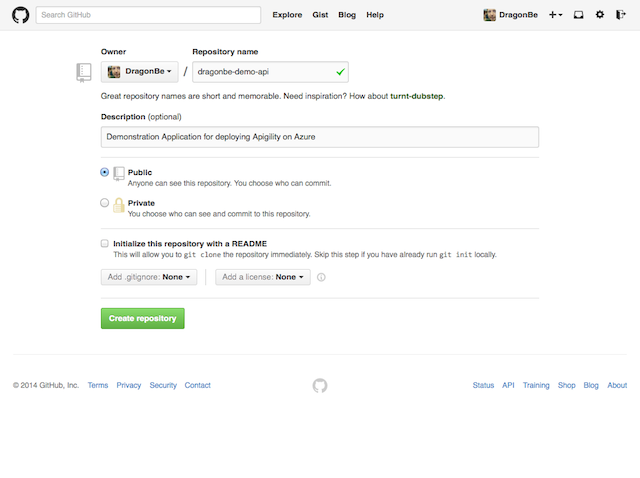
You will get instructions to add your online repository to your local GIT repository, but in basis it comes down to the following commands.
git remote add origin git@github.com:DragonBe/dragonbe-demo-api.git
git push -u origin master
Check back online to see your code is there.
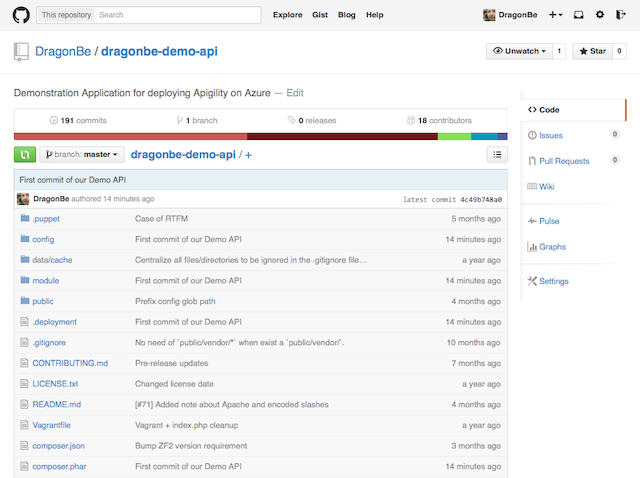
All is looking good so far. Let's leave our code for a minute because we now want to deploy on Microsoft Azure.
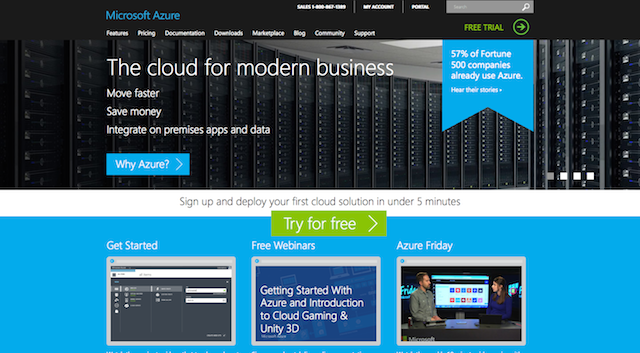
Azure time
Microsoft Azure is a cloud platform operated by Microsoft which provides a rich set of services and option to fulfill your scalability needs. One of the benefits of this platform over others is that it provides a platform as a service (PaaS) in the form of Azure Websites allowing you to "just deploy" your existing application to the cloud without a bunch of headaches and reconfigurations.
Especially in the world of PHP web application development, this is a huge benefit to launch prototypes, try scalability improvements and so on. The fact it runs IIS on a Windows OS in the background should not hold you down. PHP runs as good on Windows as on Linux.
If you don't have a Microsoft Azure account yet, you can sign up for the free trial and try out these steps yourself.
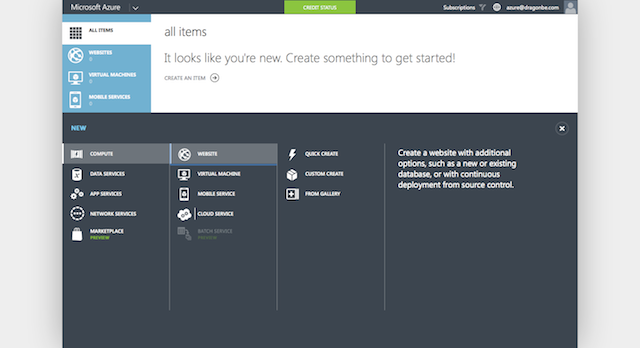
Once signed up you will be taken to the management dashboard. This is where the magic happens. We need to create a new website, so we click on the "+" (plus sign) in the lower left corner and select "compute", "new webiste" and select "custom create".
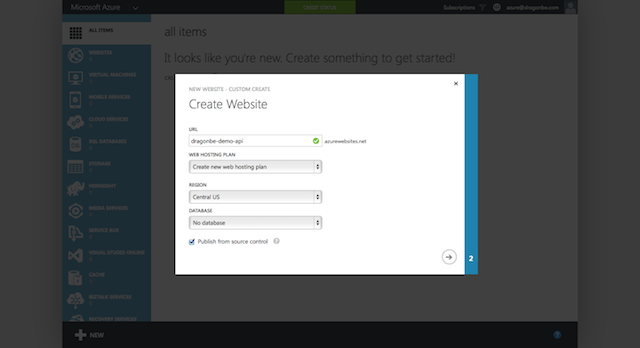
You will be presented with a popup where you can set a name for your app, create or use an existing hosting plan, your preferred region and a database (optional). The last item is what we were looking for: publish from source control.
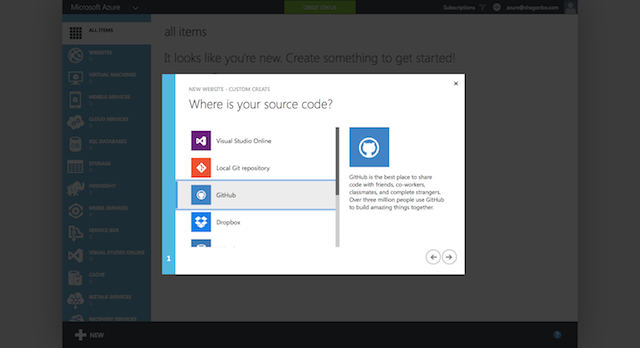
The next screen will provide a collection of publishing options you can choose from. Of course in this example we select GitHub as publisher.
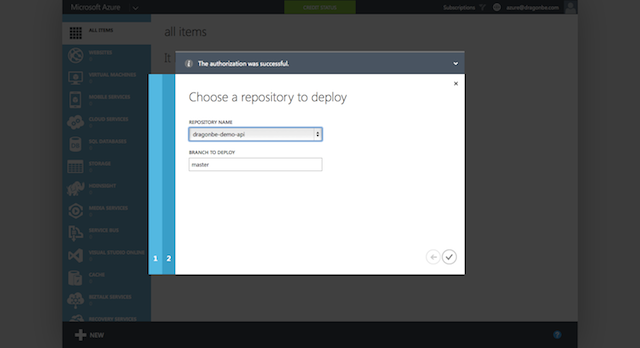
It will use OAuth authentication to gain access to your personal repositories, so you can select the correct repository from a drop-down list and define the branch you want to monitor for changes. We just take the default branch "master".
Once all detailes are filled out, the magic starts happening: a new website instance will be created, your code will be deployed on this instance and your composer installation will be executed. All in one go.
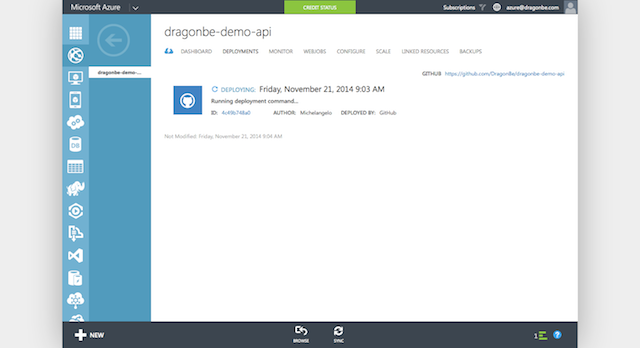
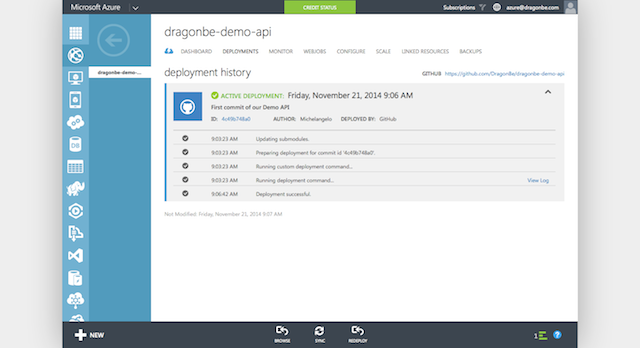
When the publishing is finished, a simple process log showing you exactly what was executed. A more detailed log is available for the deployment after publishing (the composer installation of packages).
We're live
So if you followed these instructions completed, we are now live with our API. Let's check it!
curl -i http://dragonbe-demo-api.azurewebsites.net/v1/user
This will give us the following response
HTTP/1.1 200 OK
Content-Length: 549
Content-Type: application/hal+json
Server: Microsoft-IIS/8.0
X-Powered-By: PHP/5.4.34
X-Powered-By: ASP.NET
Set-Cookie: ARRAffinity=2ffde9a06ea00acd603e02c27a9e6799c74c65620925e3f7a78146f02026b7a9;Path=/;Domain=dragonbe-demo-api.azurewebsites.net
Date: Fri, 21 Nov 2014 08:48:35 GMT

{"_links":{"self":{"href":"http:\/\/dragonbe-demo-api.azurewebsites.net\/v1\/user"}},"_embedded":{"user":[{"id":1,"firstName":"Matthew","lastName":"Weier O\u0027Phinney","_links":{"self":{"href":"http:\/\/dragonbe-demo-api.azurewebsites.net\/v1\/user\/1"}}},{"id":2,"firstName":"Zeev","lastName":"Suraski","_links":{"self":{"href":"http:\/\/dragonbe-demo-api.azurewebsites.net\/v1\/user\/2"}}},{"id":3,"firstName":"Enrico","lastName":"Zimuel","_links":{"self":{"href":"http:\/\/dragonbe-demo-api.azurewebsites.net\/v1\/user\/3"}}}]},"total_items":3}
All good, what about our entity?
curl -i http://dragonbe-demo-api.azurewebsites.net/v1/user/2
Gives us back the entity of Zeev Suraski.
HTTP/1.1 200 OK
Content-Length: 135
Content-Type: application/hal+json
Server: Microsoft-IIS/8.0
X-Powered-By: PHP/5.4.34
X-Powered-By: ASP.NET
Set-Cookie: ARRAffinity=2ffde9a06ea00acd603e02c27a9e6799c74c65620925e3f7a78146f02026b7a9;Path=/;Domain=dragonbe-demo-api.azurewebsites.net
Date: Fri, 21 Nov 2014 08:50:48 GMT

{"id":2,"firstName":"Zeev","lastName":"Suraski","_links":{"self":{"href":"http:\/\/dragonbe-demo-api.azurewebsites.net\/v1\/user\/2"}}}
Conclusion
Apigility allows you to build and manage API's very easily. Combining this flexibility with the cloud power of Microsoft Azure you will have a very powerful tool to build scalable, high performance and easy to manage API's.


Comments
Post a Comment